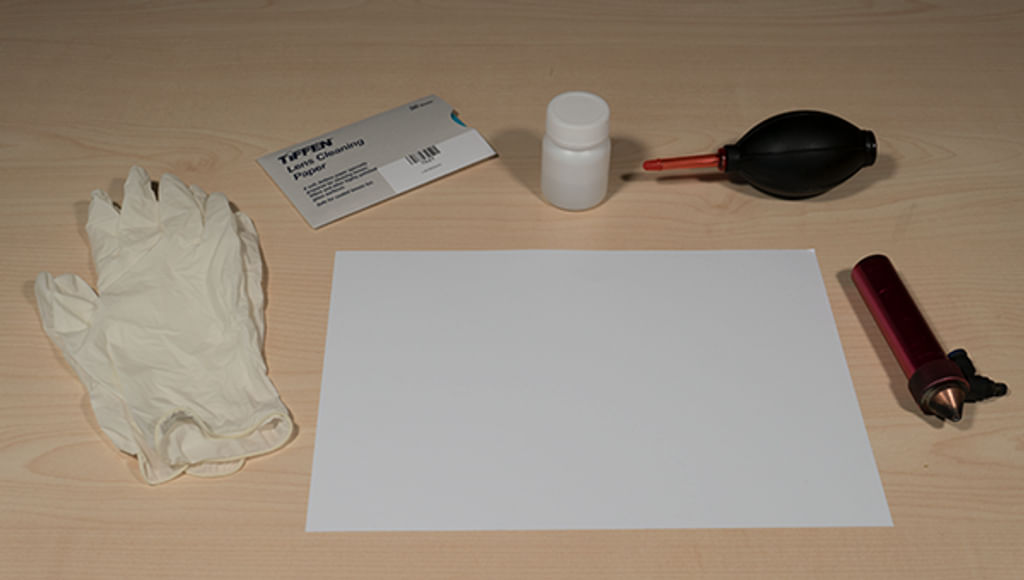
Step 1. Preparations
What do you need?
- A clean A4 paper or other piece of paper
- Alcohol 70 %
- Hand air pump blower
- Lens paper
- Latex gloves
- Good lighting
- A comfortable spot to do precision-work
Make sure your work area is clean so you can clean the lens without worrying about it becoming dirty again.
Stap 2. Removing the lens
The lens is in the lens shaft, which is inside the laser head. To remove the lens from the lens shaft, the lens shaft must first be removed from the laser head. Remove the air hose from the air coupling by pushing down the blue ring on the air coupling and pulling up the hose. If your machine has an autofocus sensor, this needs to be removed as well. The first thing you do is disconnect the autofocus sensor. At the top of the sensor is a black plug with a silver ring. Twist the ring and then you can pull up the plug.
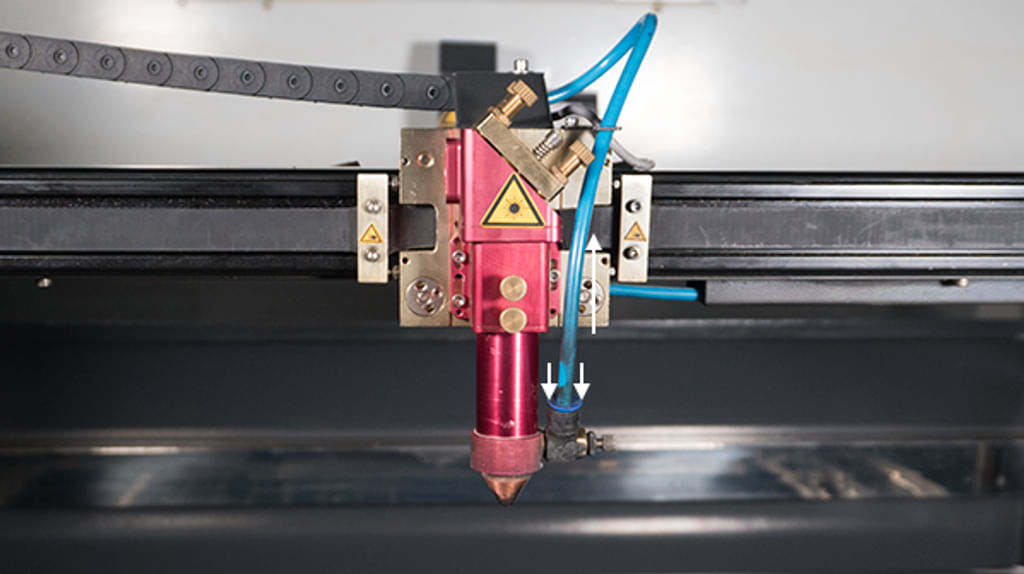
When the hose has been removed from the air coupling, the fixation bolt(s) on the laser head can be loosened by turning the bolt(s) counterclockwise.
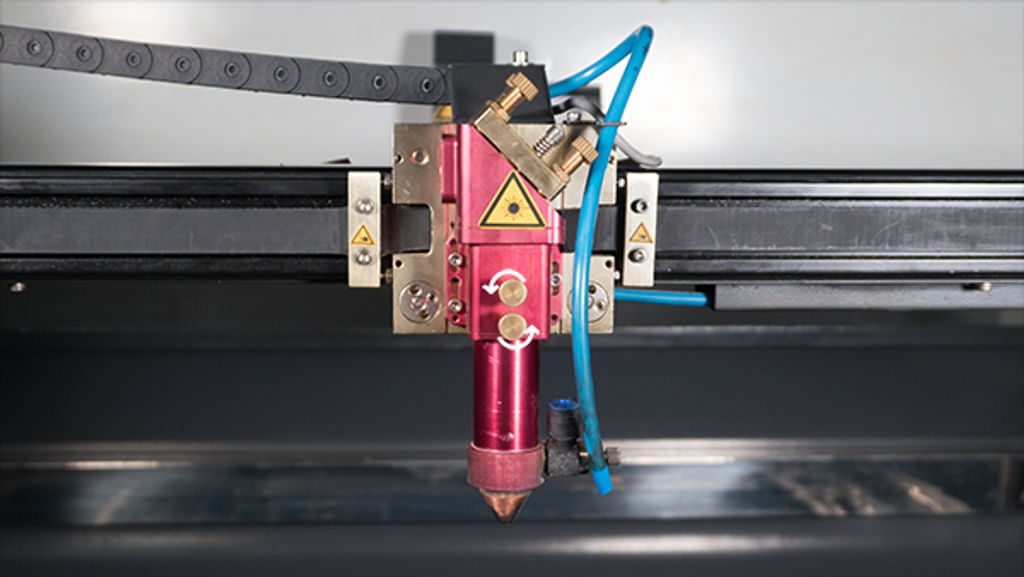
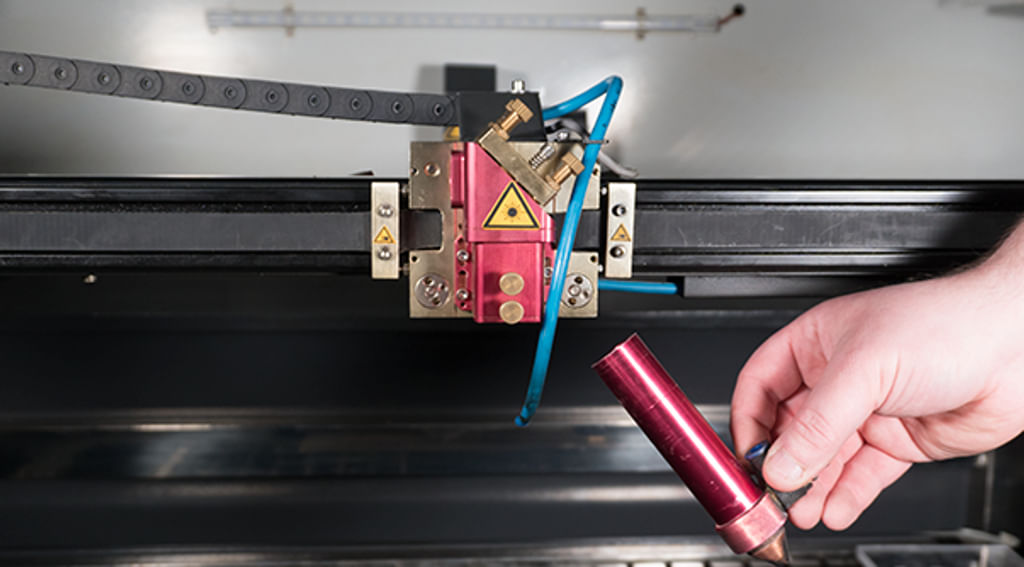
Take the lens shaft to your workstation.Turn the nozzle and the nozzle mount away from the lens shaft. Put the nozzle mount aside for now.If you have a lens shaft with multiple lens positions, threaded at the bottom and top of the lens shaft, it is important to remember where the lens is positioned in the lens shaft so you can put it back in the same place. The lens shaft and the nozzle with mount must be put together again exactly like this after cleaning.
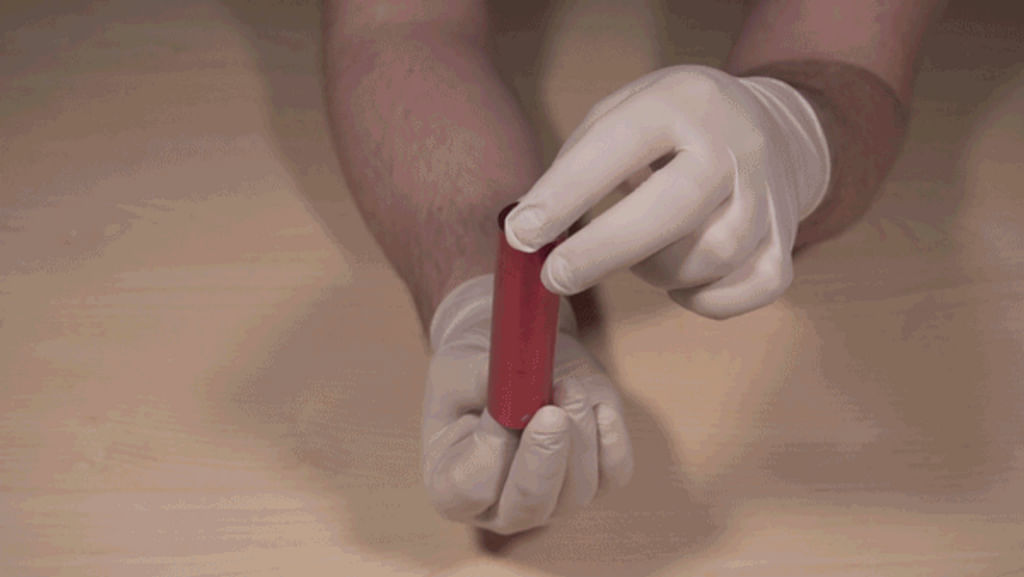
Now put on gloves. It is important to wear gloves because there is a coating on the lens that you should not touch with your hands.
Use a tool, like a flathead screwdriver, to unscrew the lens fixation ring. This ring has small notches into which you can place a tool. Make sure the tool does not slip and cause damage to the lens. Once the fixation ring is loosened, you can continue to manually unscrew it.
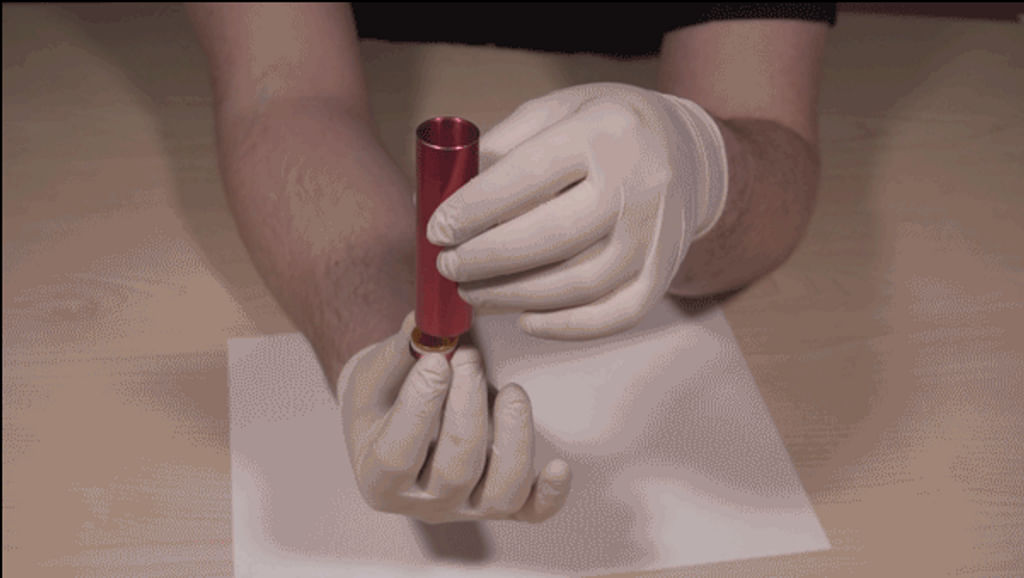
Twist the lens as shown in the picture above. It is best to hold the lens shaft at the top while the lens fixation ring, white lens ring and lens are situated at the bottom. Carefully unscrew the lens fixation ring and make sure the lens does not fall out of the lens shaft. The lens is quite fragile and will break easily if dropped or damaged.
Step 3. Cleaning the lens
Put the lens fixation ring and the white lens ring aside and then take the lens in one hand.
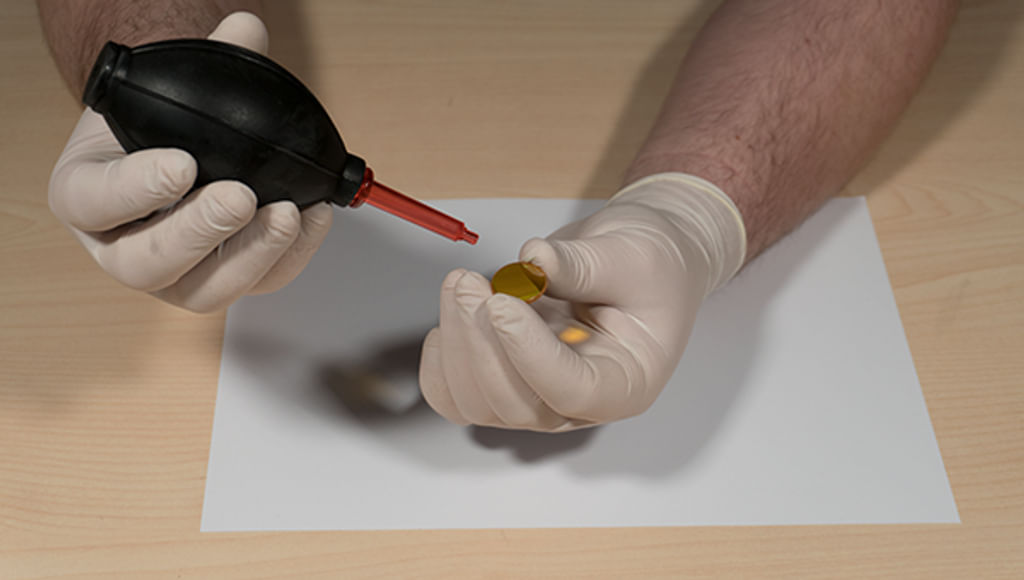
Use the air pump blower to blow loose dirt from the lens. Do this at an angle, as shown in the photo below.
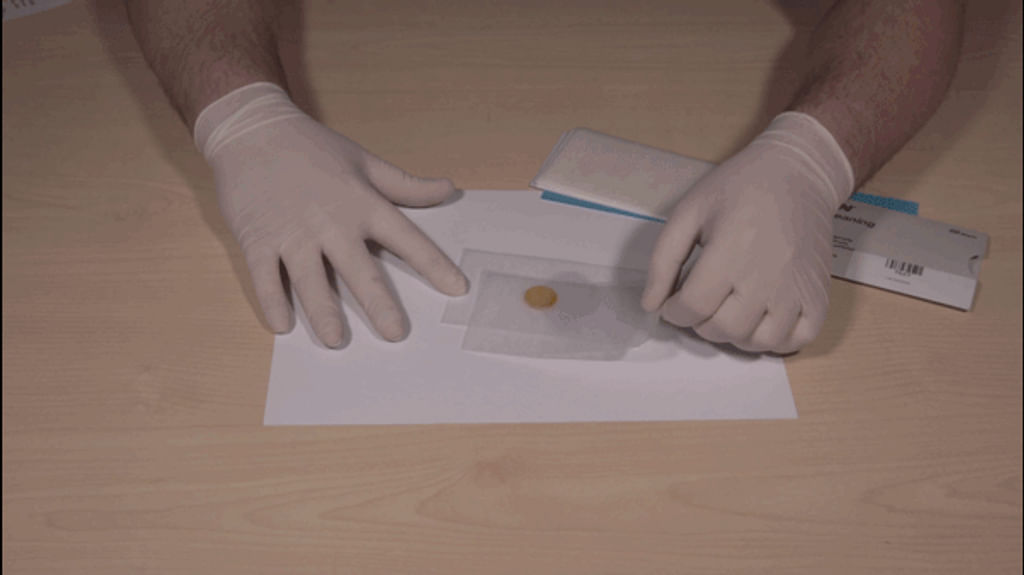
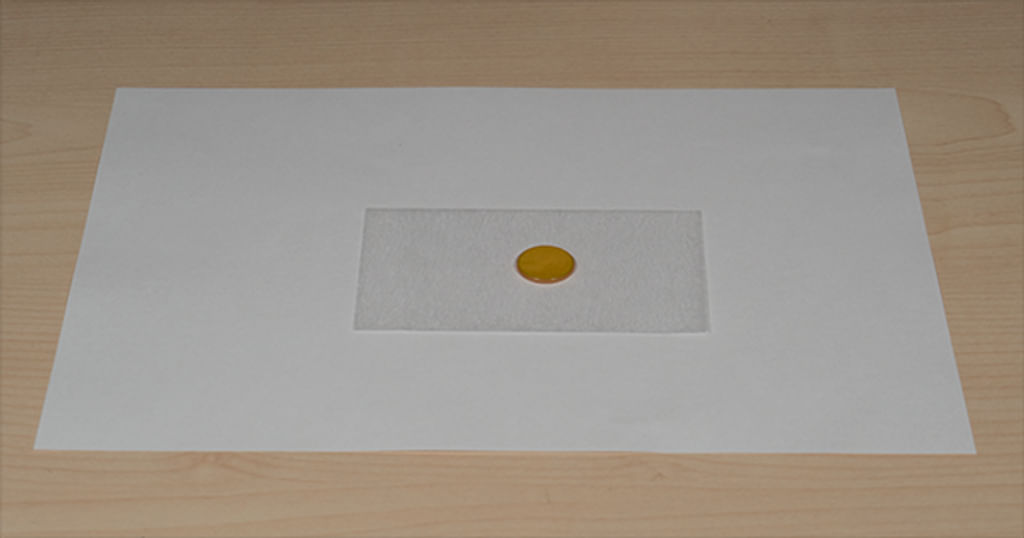
Place the lens on 1 sheet of lens paper with another sheet of lens paper on top. Then apply 1 to 2 drops of 70 % alcohol. Be sure to use only 70 % alcohol. If you use any other product to clean the lens, you will remove the coating. If the coating is damaged, stained or uneven, the lens needs to be replaced.

Gently pull the upper sheet of lens paper until the lens is completely dry.
Flip the lens over and repeat the previous 2 steps.Check that both sides are completely clean.
If the lens is clean then you can put the lens, white lens ring and lens fixation ring back together.
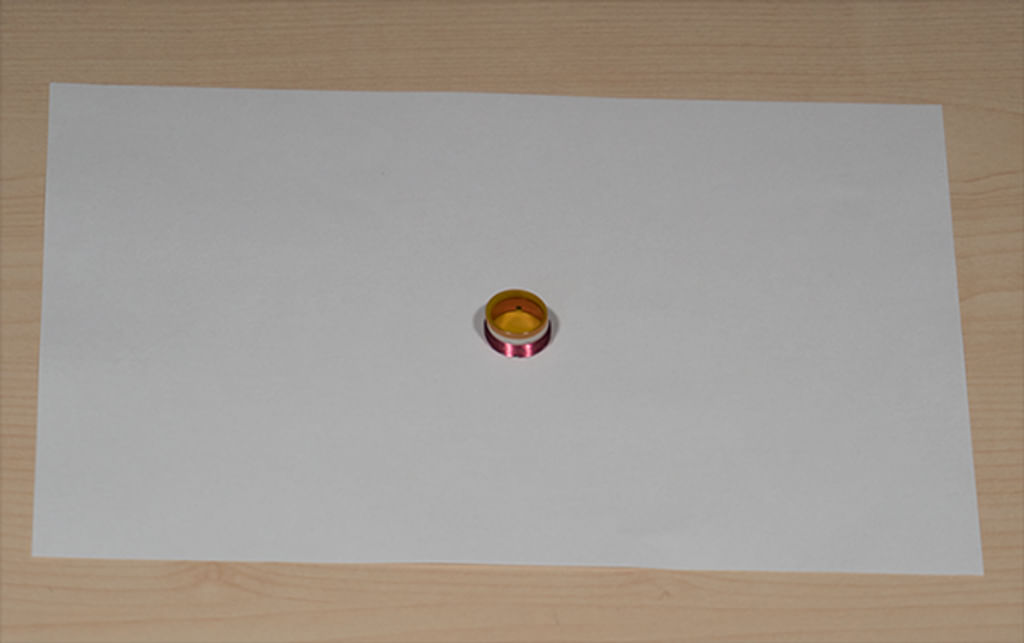
The lens must be inserted into the lens shaft with the convex side up, otherwise you will have problems with the focus height and with achieving a good cutting line. It is also essential that the lens is placed back in the same place in the lens shaft. If the lens is in the wrong place, you will have problems with the focus height and getting a nice, thin line.
Step 4. Re-assemble the lens shaft
Take the lens pack in one hand and the lens shaft in the other. You can now screw the lens back onto the shaft from below.

Once the lens is properly fitted in the lens shaft, you can replace the lens shaft in the laser head. Place the lens shaft back in the laser head and tighten the fixation bolt(s) on the laser head.

Reinsert the air hose into the air coupling. If your machine has an autofocus sensor, reattach the plug into the autofocus sensor. There is a small pin in the plug that should fall into a hole in the sensor. In other words, it can only be inserted into the sensor in one way. Connecting the plug incorrectly and pressing too hard can break the pin, and the plug and cable need to be replaced. So, make sure you do this properly.
The machine is now ready to be operated again.
Please submit a ticket if you are unable to solve the issue and we will help you.